Well, I suppose I wanted a challenge. Anyway, I thought I would pass it along for your general consumption. This is written by a video newbie, for a newbie... This is educational only. Don't steal stuff... don't break copyrights, etc. I did this as an adventure into video formats... I hope you find it enlightening. I am not a video professional. I am a casual consumer mac user... I know you are probably smarter than me. If you have useful comments, please leave them.
Perhaps some one else has figured this out already... but if not, I'll share how I got it working.
First things first. I have Comcast Digital Cable (in Denver, CO) with a motorola DCT-3412 DVR. I am running Tiger on an original 500Mhz Titanium powerbook. (I know.... a real screamer - but the good news is, your mac is probably better than mine, and therefore it should do all of this.... just faster!)
My Setup:
Powerbook connected to external firewire drive, connected to Comcast box. (you can do it directly, but I wanted to have plenty of room, thus the external drive)
Software You'll need:
Apple Firewire SDK (I used version 22 - they are now on version 23)
MPEG streamclip
Quicktime MPEG 2 playback
DVD Studio Pro - I know, but you can pick up older versions on eBay for cheap!
Toast
Optional Software
VLC - You can watch the raw footage from the DVR with this player
I start with my Powerbook on but the cable box and the external drive turned off. I plug the firewire cable from the cable box into the external drive and turn them both on. I then connect the external drive to the powerbook.
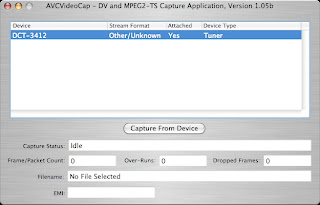
I use AVCVideoCap from the Apple Firewire SDK to record the footage in realtime. The DVR showed up right away for me in the list of devices. This is what AVC looks like. Select the tuner in the window and click "Capture from Device"
You are prompted for a save location. Once you select the destination, you get this menu:
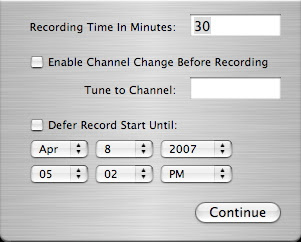
As soon as you click on "Continue" the recording begins and you see the "Frame/Packet Count" window rapidly count up. It records for as long as you told it to. I hit play on the DVR first, and then click "Continue" on AVCap after. It's okay if you have excess footage at the beginning and end... in a later step you can trim the front and back end of the video.
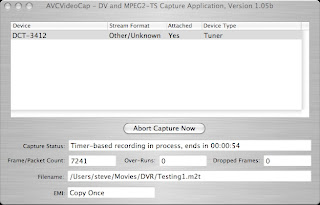
-sidenote- This is a good place to mention, you can record Live TV, or TV that you have already recorded with the DVR. I have successfully recorded programming from the major networks, as well as basic cable channels like TBS, TNT and USA. However, HBO, Encore, Sundance, and any other "paid" channels do not work... from what I have read online, they must be using some kind of encryption. It's wierd, because the file is there... it has a size, but nothing I have found, will play the file.
When it finishes, it should say Recodring Complete. You will now have a ".m2t" file on you computer. This is an mpeg 2 stream (correct me if I'm wrong)
The next few steps deal with getting the video onto a DVD.
You need to buy the Quicktime MPEG-2 Playback Component. Once you have that, you can use MPEG Streamclip (linked below) to convert the m2t file into a format that can be used on a DVD.
Drag one of your m2t files into MPEG Streamclip, it should show up in the window:
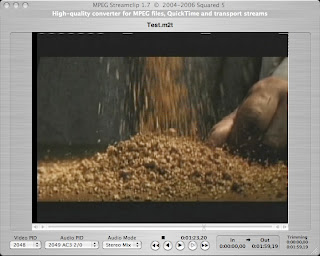
If you need to trip some off the front or back, do it here. find the place you want it to start and push the "i" button on your keyboard. This sets the "in" point. The scroll to where you want it to end and push the "o" button. This sets the "out" point. now click "Trim" from the edit menu. That chops the excess off from the beginning and end.
You can see that MPEG streamclip has lots of options. For those of you with video iPods, you could break off here and use this app to rip your video to MPEG4.... but I digress. From the file menu, select "Demux to Headed M2V and AC3"
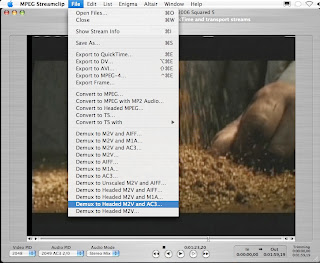
This process goes pretty quickly, since it isn't really encoding or decoding the video... it is just splitting the audio and video apart. The finished product is Two seperate files, a filename.m2v and a filename.ac3.
I use DVD Studio Pro version 1.5... I know... horribly outdated, but I have yet to spring for a newer version. If you use a newer version of DVDSP you will probably have to wing it through this section... but I imagine it will be just as easy (or easier) for you with a newer version.
Import the m2v file and the ac3 file into DVDSP. I'm not going to get into a DVD Studio Pro tutorial here... because frankly, I couldn't. I am a NOVICE at this app, and can only perform the most basic functions in it. Here is a shot of what it looks like:
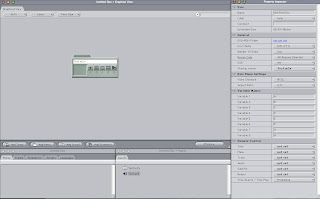
** Be sure and tie the audio file to the video file. Drag the audio file from the asset window and drop it onto the video file in the Graphical View window.
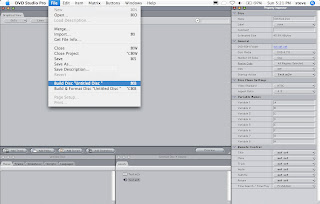
From the File menu, select Build Disc "Discname" (whatever you have named the disc project). This process takes a little while. On my machine, I think it runs at about 7x or 8x.
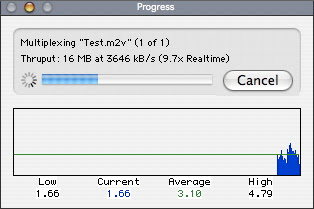
Here is a shot of the Progress window:
DVD Studio Pro builds a VIDEO_TS folder and an AUDIO_TS folder in any location you specify:
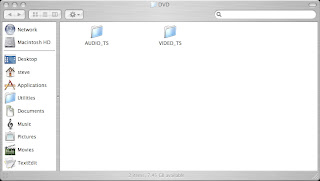
Now you're in the home stretch. In Toast, select "Data Disc", drag the VIDEO_TS and the AUDIO_TS folders into toast.
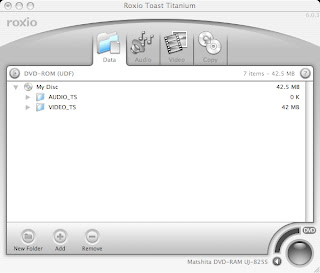
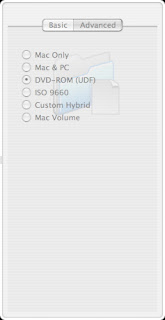
Be sure to select "DVD-ROM(UDF) in the sidebar:
Now click burn! When it's all said and done, you should have a DVD that can play in any commercial DVD player or computer. I hope you'll leave comments that are helpful to other video tinkerers....
